New Page
Description
This guide describes how to create transport slots, view the pick-ups within them, and set the schedule.
Accessing the Transport Schedule
You can access this page from the Donations group by clicking on the "Transport Schedule" link on the black menu bar. It will display a page similar to this:

This shows the date of the transport, an optional title, the towns we will be picking up from, the overall duration of the transport, how many pick-ups have been scheduled, and the amount of time available for pick-ups.
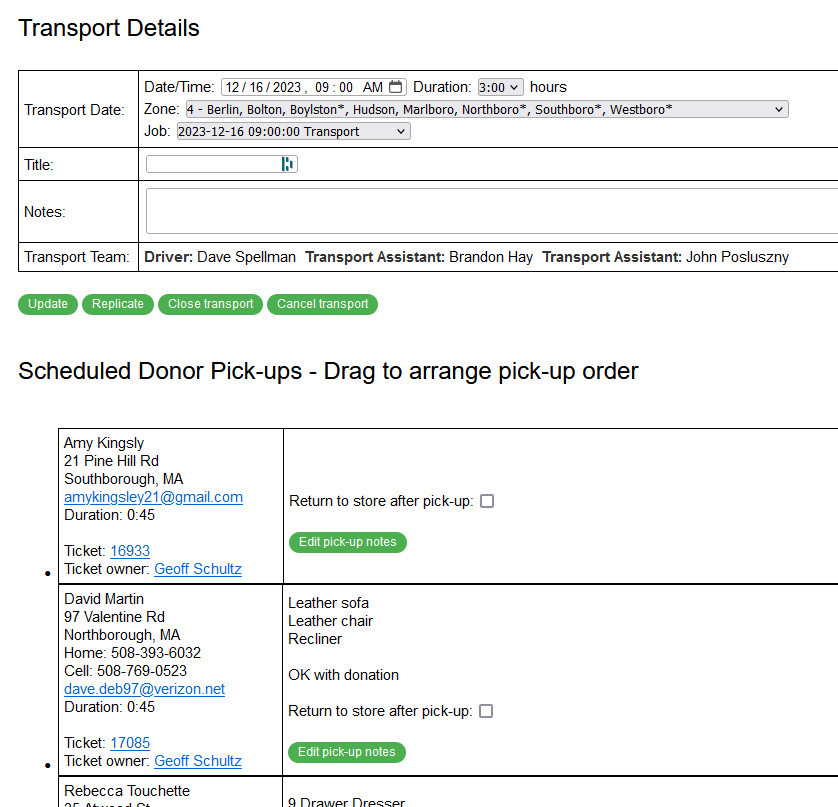
If you click on one of the dates, it will display the details for that pick-up:

Creating a New Transport Slot
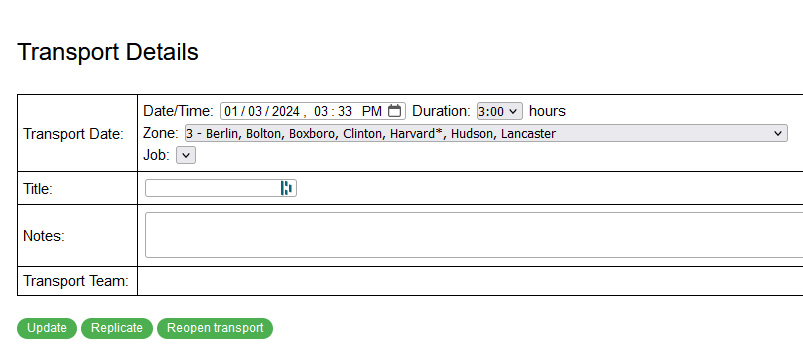
At the bottom of the Transport Schedule display, there is a button labeled "Schedule New Transport". Click on that and you will see:
- Click on the calendar icon in the Date/Time field, and select a date. Set the time to whenever the pick-up should start (typically 9:00 AM).
- Set the duration to however long the pick-up should last. The typical duration is 3:00 hours.
- Select a zone for the pick-up.
- We typically alternate between zones 4 and 5.
- Zone 99 is reserved for special pick-ups that aren't constrained by ZIP code.
- If a volunteer job has been scheduled for the date in the Date/Time box, one or more jobs will appear in the Job drop-down menu. Typically you will pick the "Transport" job. If volunteers have signed up for that job, the Transport team field will populate with the divers and movers signed up.
- Press Update to save your changes.
Transport Schedule Routing
To arrange the pick-up schedule:
- Use the above section to open the transport schedule for a given date. Typically, we do this on the Thursday (Friday at the latest) before the pick-up.
- Press the Map button at the bottom of the page.
- We like to schedule the furthest away pick-up first and then work our way back towards the store. That way if we have to drop off furniture at the store mid-route, we're closer to the store.
- Use Google Maps to arrange the pick-ups in an order that makes sense.
- Note the order of the pick-ups.
- Return to the browser page you opened in step 1 and drag the tickets into the same order you did in step 4.
- Press the Map button to make sure that the order is correct.
- If appropriate, use the Send Email buttons to notify the donors and the team.
Update User Settings
On the main page of the Call Center, you will see a link for "Press here to update your account information." When you click on this link, you will see the normal settings to update your account information, plus the following:
- Enter the initials that you want to display on tickets that you own on the Open Tickets page.
- Check any days that you want to receive emails regarding new tickets. You will always receive an email, regardless of what's checked above, when a donor updates a ticket that you own.
- Press Submit when you're done.


