Skip to main content
Inventory Entry System
Main Menu
- Turn on the lights in the photo area.
- Position the lights so that they adequately illuminate to photo area.
- Go to the Volunteer page on the FS website
- Log in
- Select the Inventory Entry application
- This icon opens to the Main Menu of the Inventory Entry System
- You will see the following screen, which allows you to create new items, edit existing items, and set the color balance.
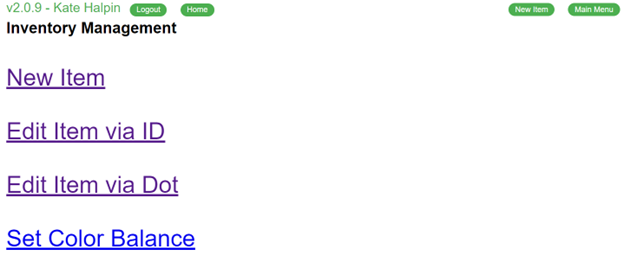
- The "New Item" link allows you to create a new item
- The "Edit Item via ID" allows you to edit an existing item by the inventory ID
- The "Edit Item via Dot" allows to to edit an existing item via its "dot" code (ex A123)
- The "Set Color Balance" allows you to adjust the color balance of the light that you're photographing in. Suggested values are provided.
Creating/Editing an Item
- If you press the "New Item" link, you will be presented with a blank item form
- If you press the "Edit Item via ID/DOT", you will presented with a form to enter the inventory ID or the Dot code. If the system can find the item, the form will be filled in with the existing data.
- The steps to inventory most furniture and housewares are the same. In the following example, we will use appliances as an example of how to enter a new item into the inventory system.
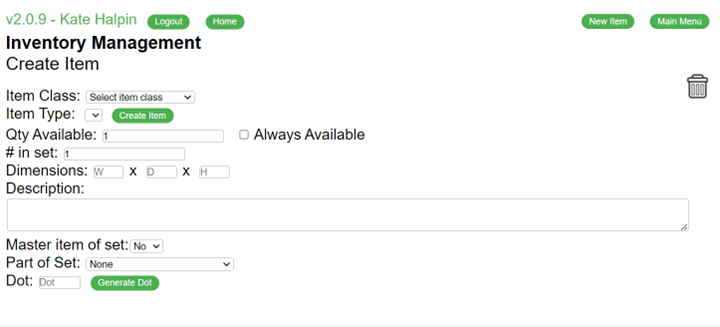
- All items are grouped by class. Examples of classes are Kitchen, Lamps, and Tables
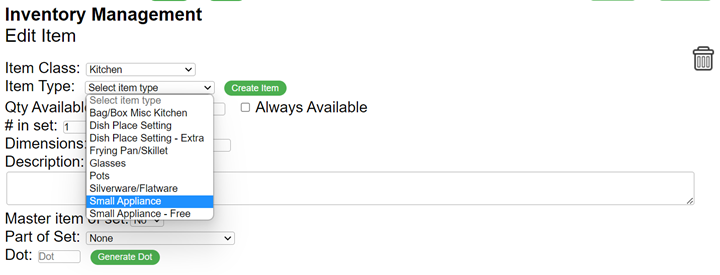
- Within each class, there are different types of items. The drop-down list will change based on the class.
- For example, "Small Appliance", "Small Appliance - Free", and other types are options in the Kitchen class.
- Select Kitchen in the Item Class drop-down menu
- Select "Small Appliance" from the Item Type

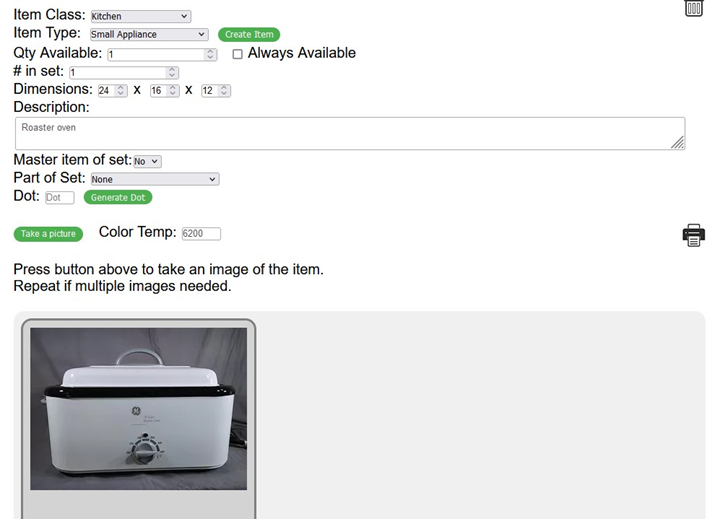
- Enter Details:
- Qty Available – default is 1. If we have received 10 coffee makers of the same type, change this to 10 and print 10 labels.
- # in set – default is 1. For example, if a dish set contains 4 place settings, change this to 4. If there are 2 matching end-tables, change this to 2.
- Dimensions – width x depth x height in inches
- Description
- Add a note, if necessary, to describe the item
- If an item is heavy, be sure to make a note of that.
- If there are flaws, include a description of the issue.
- Master item of set
- If there are multiple items in a set (ex: a dresser with a matching end table), select Yes to mark the dresser as the master item.
- Part of Set
- If this item is part of a set of items (ex: a matching end table to a dresser which is marked as the master part), select the master item from the list
- Dot
- If an item has multiple parts (ex: a headboard with a footboard, rails, slats, etc), press the Generate Dot button to create a dot code. The dot code will print on the label (ex: A123), and you should manually write the dot code onto the colored labels and stick them onto the parts. Also, stick the same color dot onto the label so the movers will know to look for a red A123 dot.
- Press the Create Item button to create a new item or press the Update button to save changes to an existing item.
- To print a label:
- Select the Printer icon
- Wait for the system print dialog box to appear.
- If you need to print multiple labels, change the quantity in the Copies.
- Press the yellow print symbol.
- Scotch tape the label to the item. Don’t stick the label directly on the item.
- To take a picture:
- Select Take a picture
- If the object is wider than it is high, take a horizontal picture. Otherwise, take a vertical picture.
- Click on the single “tree” icon on the left side of the screen. This will zoom in and allow you to take photos that aren’t distorted by the wide-angle lens. Step away from the object if necessary.
- Try to fill as much of the frame as possible.
- Click the Take Picture button
- Review the photo. If you’re happy, press OK, otherwise, press cancel and retake the photo.
- Add a second photo if the 1st picture doesn’t adequately show the item's print or color, take a closeup for a 2nd shot.
- Add additional photos to document any major flaws.
- If you need to Re-take a photo after you created an inventory number, DO NOT delete the original photo. Take the 2nd photo first, and then delete the original photo.

- Move the item to the appropriate storage location.
- If you have more items that need to be inventoried, press the New Item button and repeat.